1) Connect the GPS to your computer with a USB cable. Wait for the Garmin to be recognized. On Windows computers, select "View Files and Folders" when prompted. On Mac computers select the Garmin device in Finder.
3) Locate the map Disc Image file on your computer...
Windows Computers:
Double-click the X-Package Files shortcut on your Windows desktop to locate the Disc Image File (i.e., GPS Trailmasters Snowmobile Grand Touring.img).

Using the File Explorer window, locate the Disc Image file by clicking the Garmin folder and then the Maps folder.
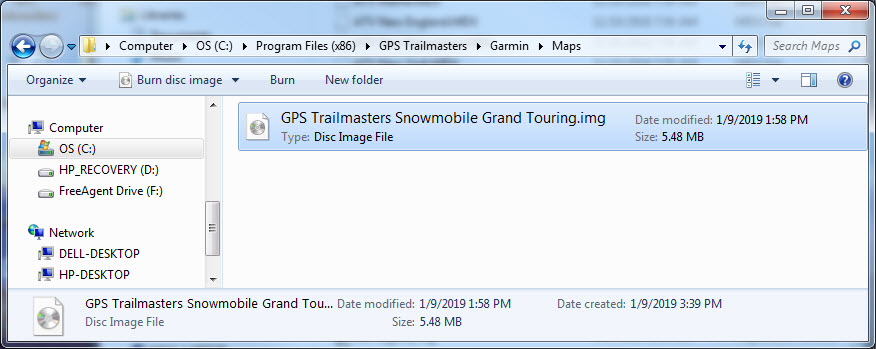
Bring up a second File Explorer window to view the files and folders on the Garmin GPS.
NOTE: If you don't see the GARMIN device, check the USB cable or try the cable in a different USB port.
Drag the Disc Image File (.img) from the shortcut File Explorer window (shown above) to the GARMIN device File Explorer window (shown below). Drag the file (.img) to either the 'Garmin' folder or the 'Map' folder depending on your Garmin GPS model.
- Handheld and older model GPS units copy to the 'Garmin' folder.
- Nuvi and newer model zumo's copy to the 'Map' folder. You may need to create the 'Map' folder when installing the map for the first time. The 'Map' folder should be created at the same level as the 'Garmin' folder (see image below).
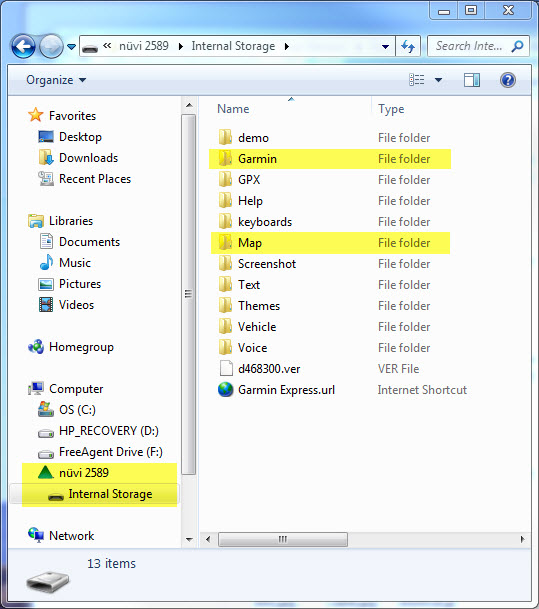
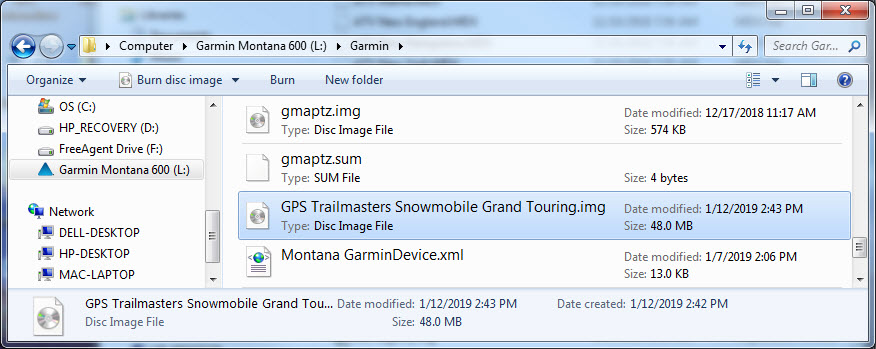
If the map is not listed on your GPS in the Map Information settings, then you don't have the correct folder, move the Disc Image File to the other folder.
If it's still not listed, some very old GPS units, like the Nuvi 500 do not support custom map names so you must rename the file to "gmapsupp.img" in the 'Garmin' folder.
You can also copy to an SD card in your computer or Garmin GPS. When using an SD card the Disc Image File must be copied to the 'Garmin' folder and renamed to "gmapsupp.img". Create the 'Garmin' folder if
its a blank SD card.
Mac Computers:
Bring up a Finder window.
Click your Home folder (i.e., Doug) to locate the Disc Image File in GPS Trailmasters\Garmin\Maps (i.e., GPS Trailmasters Snowmobile Grand Touring.img).
NOTE: If you don't see a home folder with your name, click the Finder -> Preferences, click the Side Bar tab and check-mark your home folder for display.
Locate the Disc Image file by clicking Home (your name) -> GPS Trailmasters -> Garmin ->Maps.
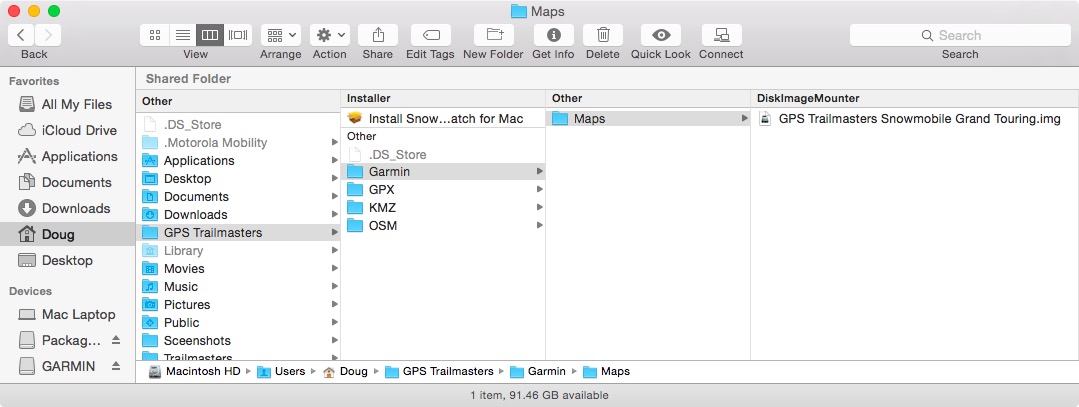
Bring up a second Finder window.
Click the GARMIN device to see the files and folders on the Garmin GPS.
NOTE: If you don't see the GARMIN device, check the USB cable or try the cable in a different USB port.
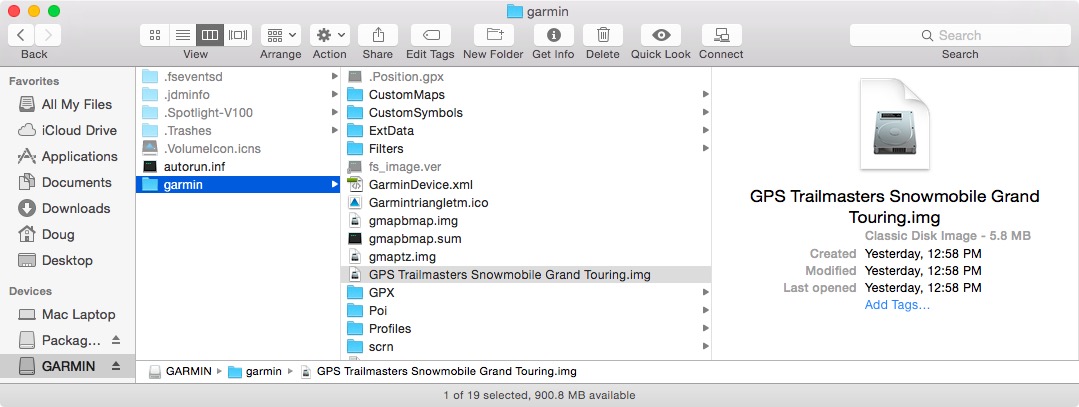
Drag the Disc Image file (.img) from your Home folder (Finder window shown above) to the GARMIN device (Finder window shown below). Drag the file (.img) to either the 'Garmin' folder or the 'Map' folder depending on your Garmin GPS model.
- Handheld and older model GPS units copy to the 'Garmin' folder.
- Nuvi and newer model zumo's copy to the 'Map' folder. You may need to create the 'Map' folder when installing the map for the first time. The 'Map' folder should be created at the same level as the 'Garmin' folder.
If the map is not listed on your GPS then you don't have the correct folder, move the Disc Image file to the other folder.
If it's still not listed, some very old GPS units, like the Nuvi 500 do not support custom map names so you must rename the file to "gmapsupp.img" in the 'Garmin' folder.
You can also copy to an SD card in your computer or Garmin GPS. When using an SD card the Disc Image File must be copied to the 'Garmin' folder and renamed to "gmapsupp.img". Create the 'Garmin' folder if
its a blank SD card.
